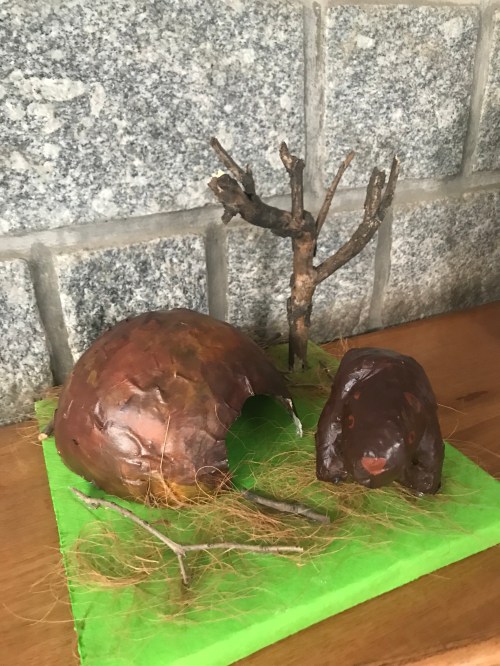
Here’s something we made for P’s hindi project. She had to make an animal and its house. We decided on making the bear and his cave coz that’s one thing I could think of to make with paper mache 😁. Its not the best sculpting….. but turned out decent.
Making such projects is always fun. It helps us bring out our ideas and creativity. We collaborate to bring together our ideas. We plan the project , bring our resources together and work together as a team. P acts as the leader in making the final decisions as to what we are going to do. She takes my suggestions and adds her own and makes a final plan. So there are so many benefits of doing this stuff. I know it’s time consuming and sometimes can be really tedious…. but just see the benefits! Very do able and fun once in a while.
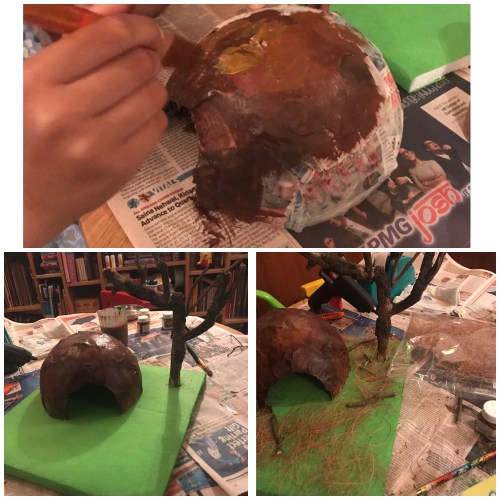
So here’s a brief description of what we did.
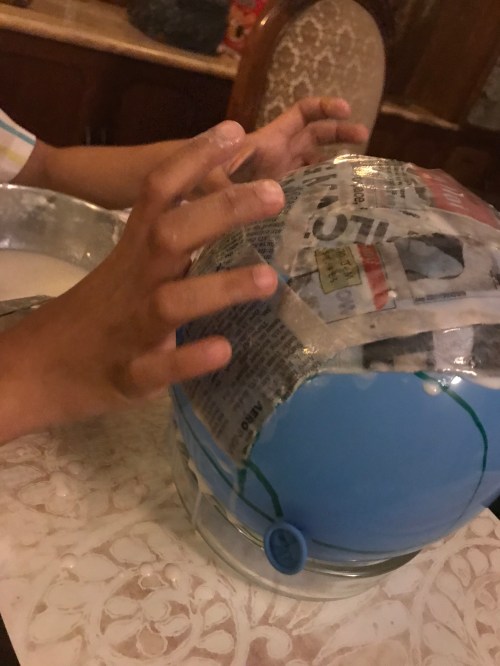
1. We got to work 3-4 days in advance. We made the cave first. Coz we had to give it time to dry so we could paint and stick it on the base. We used a balloon for the base of the cave and stuck the paper mache (bits of newspaper dipped in a solution of 1 part maida and 2 parts water) on half of it. After it dried the next day…. P just popped the balloon and we had our cave!
2. We made a list of what all we needed further and made a trip to Itsy Bitsy. Now the kids are always just looking for a reason to go there. They will go and collect all kinds of stuff which they will use up within an hour or keep it in the drawer and forget about it forever. A was most excited to go. “Mamma Anu ke liye kya lenge?” (Mamma what will we take for Anu?). She wants to buy those glittery pink and purple stickers all the time. The flowers and butterflies. So 2 more sticker sheets for her. We bought some green felt (for the base) and some hay looking stuff (which I later realised was only coconut husk 🙄) and a wooden dowel stick to make a tree (little did I realise that we wont need it coz we finally used a twig fallen on the road) and some brown acrylic paint.
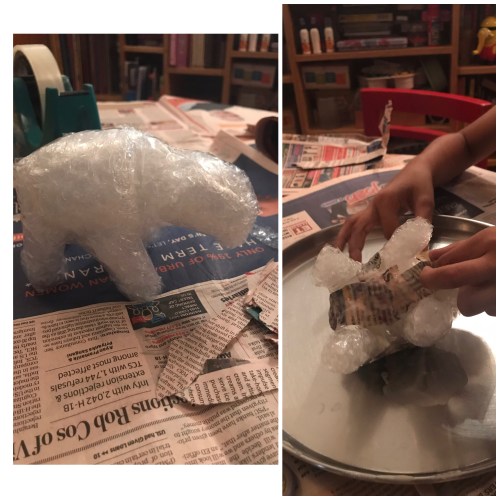
3. One the way home we took a short walk on the street to collect some twigs to make trees and to spread over the forest floor. On reaching home we first started making the bear. I made a rough body out of bubble paper and cello tape and P covered it with paper mache and we left it to dry. (Needs overnight)
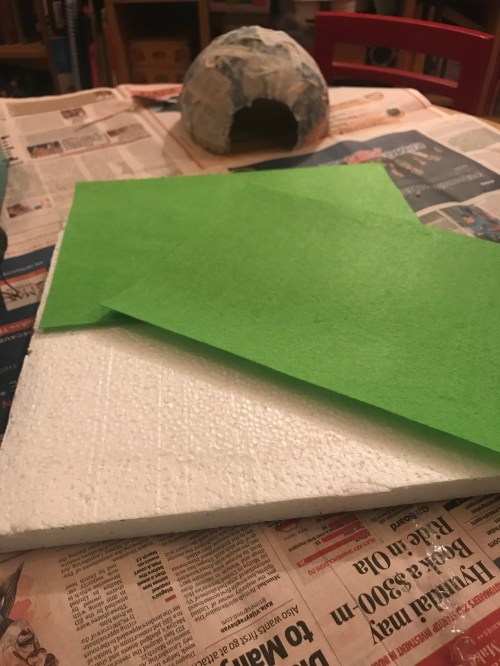
4. Next step was to get the base ready. We stuck the felt pieces on a thermocol base and painted the White edges in the same light green colour to cover it.
5. Then the painting of cave was done followed by sticking it (used hot glue) to the base and erecting a tree. The Initial idea was to have ‘some’ trees and trees with ‘foliage’ (P wanted to do that by painting cotton and sticking on it). But after we had the basic layout we thought that this was just right. So we spread some of the husk and stuck some small twigs around to give it the forest floor look.
The bear was still wet so had to be left for the day.
6. We let the bear dry over night. The next day P painted it and we finally stuck it on the base to complete the project!
